How to easily make your own DO IT YOURSELF Sewing Table

First, you really do not have to make a table because any table will suffice.  Plus you can go to any thrift shop and for maybe $25 – $50 you can find yourself an antique sewing table.  However, if you want more space and would like a bigger table, I have the solution.

Items needed for DO IT YOURSELF Sewing Table:

Materials:
1. Electric Tape
2. 72″ Table

Tools:
3. 2″ Hole Saw Drill Bit
4. Drill

Simply use the drill bit to put a hole in the table wherever you prefer your cords to go down.  This is helpful because you can use this hole for all your cords without having them drape over the backside. This takes maybe 2 minutes.  Use the electric tape around the edge of the new hole so it isn’t sharp and doesn’t accidentally damage your cords.  Once this is done, you have a 6 foot sewing table that you can slide your cords through. This is a simple fix for anyone that wants a sewing table that is under $40 dollars total.

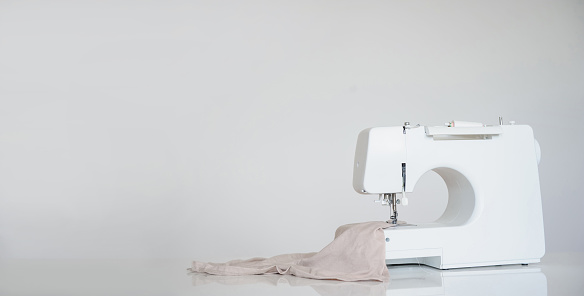
Thrifting 101, Learn to Sew. Best Sewing Machines for Beginners

It is essential to understand that not all sewing machines are created equal. Different sewing machines serve various functions and purposes: Sewing only, sewing embroider, sewing-quilting, serger machines. Before buying your machine, you need to consider many factors. Will you need it often or occasionally? Do you need a portable machine? Will you be quilting? Do you want to try embroidery too? Knowing these things will help you find the best sewing machine for you as a beginner.
And considering all possible usage of sewing machines, I have shortlisted the best models to ease your confusion. So let’s get started and check out the best options.

7 Best Sewing Machines for Beginners (Summary)

  1. Best overall: Singer Stylist 7258
  2. Best Brother: Brother CP60X
  3. Best Heavy-Duty: Singer 4423
  4. Best For Sewing & Quilting: Brother CS7000X
  5. Best For Sewing & Embroidery: Brother LB5000S
  6. Best For Sewing, Embroidery & Quilting: Brother SE600
  7. Best For Kids: Magicfly Portable

Things To Consider While Buying A Sewing Machine 

You don’t buy a sewing machine every other day. Hence, considering the following features while getting the machine is a must to ensure your money is being invested in the right place-

Number of Stitches 

The number of stitches is one of the most important factors to consider when buying a sewing machine. Multiple stitching patterns help you create different designs.

Even though, as a beginner, you’d mainly stick to a single sewing pattern, you’ll eventually start experimenting. Hence, getting a machine with different stitches will be helpful since it’s a pricey investment.

Stitching Speed 

A machine with variable speed control is a must, especially for beginners. A machine with a variable stitching speed is necessary because it saves you from repeated mistakes.

You’ll want to start slow during the beginning phase, and eventually, as you get better at sewing, you can adjust the speed as per your expertise.

Stitch Quality 

The final result ultimately depends on how well your machine stitches. Irrespective of whether stitching is your hobby or you want to make it a profession, you want your end product to be refined.

But here is a catch. Not every expensive machine has excellent quality. You may see sewing machines with the fanciest features, but they are not good in stitching quality.

Therefore, a careful inspection is a must. Some machines allow you to control the space between each stitch, which is a great plus. You may want to look for something similar, as these features make sewing more straightforward and faster.

Your Stitching Need 

Your sewing machine should be ideal for this purpose. Do you need a machine for basic stitching, or do you want to make embroidery? Will you stitch quilts, curtains, denim, leather, and other heavy fabrics?

Do consider these questions while shortlisting your model. There is no point in buying a cheap, fragile sewing machine to stitch heavy fabric. It will neither give you desired results nor will it last long.

Hence, considering sewing expectations is a must so that your machine provides the best performance.

Budget 

Clarifying how much you want to spend on the sewing machine will help you stick to the models within your range. It avoids unnecessary confusion and any other budget-related issues.

You will usually find a robust, good-quality machine between $300-$500.

Accessories 

Most popular sewing machine brands like Singer, Brother, Janome, and Babylock provide an accessory box with the sewing machine. You would find all the necessary accessories like bobbins, needles, scissors, buttons, rotary cutters, etc.

Check out the list of accessories while buying the machine, as it saves the extra cost of buying them separately.

Best overall sewing machine for beginners 

Singer Stylist 7258


Specifications

  • Size- 14.5 x 7.5 x 12
  • Weight- 18.74 lbs
  • Built-in stitches- 100
  • Stitch applications- 203
  • Stitch Per Minute- 750

Singer has been a dominating brand in sewing, embroidery, and quilting machines. Their wide range of sewing machines caters to the needs of all sewists.

Singer Stylist 7258 is one of my top picks for beginners. The machine features high-tech features like electronic speed control, auto tie-off for straight stitch, automatic reverse, automatic needle threader, etc., to reduce manual work.

However, these features are not too complicated, making it easier for beginners to maneuver over the machine.

Furthermore, the 100 built-in stitches and 203 stitching applications allow beginners to experiment with different designs.

This versatile stitching will help you become an expert in embroidery, quilting, basic stitching, and every other sewing need you can think of.

Errors like choosing the wrong stitch pattern are pretty common for beginners. But not anymore. The LCD screen on the front lets you see the stitch pattern, stitching width, and length, minimizing the chances of errors and wastage of time.

Different sewing projects need different stitching speeds. Hence, the Singer Stylist 7258 comes with a Speed Control Lever. So whether you’re working on intricate embroideries or need fast sewing for curtains, Singer 7258 has you covered.

Since this sewing machine has all the essential features, you won’t need to upgrade even after you pass the beginner phase.

Pros 

  • Electronic speed control makes working on different fabrics effortless
  • Adjustable stitching speed
  • Free armhole stitching
  • Large workspace

Cons 

  • The build quality could have been better

Best Brother sewing machine for beginners

Brother CP60X Computerized Sewing Machine

Specifications

  • Size- 6.65 x 16.26 x 12.21
  • Weight- 14.5 lbs
  • Built-in stitches- 60
  • Stitch Per Minute- 750

Brother CP60X Computerized sewing machine is best for beginners who want to make the most of their sewing time.

This workhorse includes 60 in-built stitches letting you design, decorate, and stitch on any fabric. Plus, the seven auto-size buttonholes and adjustable stitching speed will ensure you ace your work.

It’s pretty frustrating to thread the needles manually. But the automatic needle threader makes your work even easier without tiring your eyes. Additionally, the fixed needle bar does not let the needle move for clean and professional stitching.

Stitching collars, hems, and zips are complicated as they are hard-to-reach areas. This is where Brother CP60X’s free arm feature comes to the rescue. You can remove the extended board when stitching such areas to finish your job without fuss.

The sewing machine has a wide table, making working on larger fabrics convenient. Additional features like the LCD screen, automatic thread cutter, and bobbin winder make the job easier for beginners.

You’ll receive an accessory box with Brother CP60X with all the necessary accessories like needles, scissors, and bobbins, saving you some extra bucks.

Pros 

  • Multiple built-in stitch styles let you cater to different stitching projects.
  • Automatic needle threader
  • Programmable needle up down
  • LCD screen for reviewing stitching style, length, and width

Cons 

  • Not a very compact model


Best heavy-duty sewing machine for beginners

Singer 4423 Heavy-Duty Sewing Machine

Specifications

  • Size- 6.25 x 15.5 x 12
  • Weight- 14.5 pounds
  • Built-in stitches- 23
  • Stitch Per Minute- 1100

Singer 4423 is another beginner-friendly model from the brand. This heavy-duty machine has a powerful motor with high sewing speed.

It can efficiently pierce heavy fabrics without damaging the needle and fabric. Additionally, the 23 built-in stitches and 97 stitch application make basic stitching, embroidery, heavy sewing, decorative stitching, and stitching on stretchy fabrics easier.

Such versatile stitches will help you work on home decor items, apparel, quilts, etc.

Also, the motor is equipped with stitching faster and can stitch up to 1100 stitches per minute. Further, the automatic needle threader threads needle swiftly and will no longer strain your eyes.

It has an extra high-pressure foot making stitching convenient for beginner sewists. Singer 4423 also has a free armhole; hence stitching complicated areas won’t be an issue.

You’ll also get an accessory kit that includes all essential things like- a button sewing foot, zipper foot, spool caps, screwdriver, seam ripper, lint brush, etc.

Lastly, the machine is made from heavy metal for durability so that when you upgrade from a newbie to an experienced sewist, the sewing machine will be able to keep up with your growing business.

Pros 

  • Automatic needle threader
  • Reverse lever for backstitching
  • It makes working on thick fabrics easier
  • The accessory box includes all the essential things

Cons 

  • It lacks some advanced features like the LCD screen
  • Getting used to the foot control gets a bit complicated

Best sewing & quilting machine for beginners

Brother CS7000X Computerized Sewing & Quilting Machine


Specifications

  • Size- 6.65 x 16.26 x 12.21
  • Weight- 14 pounds
  • Built-in stitches- 70
  • Stitch Per Minute- 750

Brother CS7000X won’t disappoint you when it comes to handling versatile projects. It’s a great entry-level sewing machine featuring all essential features.

It includes 70 in-built stitches using which you can embroider, sew, make quits and work on endless projects. Beginners prefer easy-to-use sewing machines, and the Brother CS7000X is meant for the same.

There are no complicated fancy systems. Features like automatic threading, adjustable stitching speed, auto-size buttonholes, free-motion quilting foot, etc., help you get your work done faster.

Additionally, its large detachable tables are best for working on heavy fabrics like quilts. This free armhole will also make working in hard-to-reach areas convenient.

Talking about durability, the Brother CS7000X has a robust body that is made to last you years. Overall, Brother CS7000X is equipped to handle all beginners’ sewing and quilting needs.

But the machine is slightly on the expensive side, which is justified, considering the build quality and features.

Pros 

  • A detachable table makes working in hard-to-reach areas easy
  • Free-motion quilting foot for easy stitching
  • Supports versatile stitching projects
  • Robust body

Cons 

  • The LCD screen could have been a bit larger
  • Sometimes the thread gets entangled on the back side of the stitched fabric

Best sewing and embroidery machine for beginners 

Brother LB5000S Star War Sewing & Embroidery Machine

Specifications

  • Size- 41.9 x 19.6 x 30.5
  • Weight- 26 lbs
  • Built-in stitches- 80
  • Stitch Per Minute- 710

Beginners would love using the Brother LB5000S. I especially love this machine due to its overall look and ease of use.  This special star war edition machine has a durable body that won’t tear off when you opt for a bigger studio space.

Talking about stitching features, the Brother LB5000S includes a sizeable smart color display to preview stitch design, width, and length before stitching.

Trial and error is a part of learning, but repeated mistakes lead to fabric and time wastage, but the screen prevents these mistakes to a great extent.

It’s a two-in-one machine that supports both embroidery and basic stitching. Therefore, shifting from basic sewing to embroidery gets more convenient.

Options are unlimited with the Brother LB5000S. The touchscreen LCD display lets you change thread colors, move designs, and place lettering in the arc with the drag-and-drop function.

There are more than 80 in-built embroidery designs, but you can add more designs with the USB port, so meeting your customer’s needs won’t be an issue.

You also learn buttonholes, action zigzags, monogramming, overcasting, blind stitch, zipper, and more with the machine’s seven quick-change sewing feet. What more do you need in a machine, right?

The speed adjustment lets you work efficiently according to fabric, style, and design complicacy. However, the machine is a bit heavy, so moving it to and fro might be an issue.

Pros 

  • Best for doing embroidery and stitching
  • Touch screen LCD screen for reviewing & editing designs
  • Speed adjustment
  • Durable body

Cons 

  • The machine is a bit heavy
  • The working area could have been bigger


Best sewing, Quilting & Embroidery machine for beginners

Brother SE600 Sewing & Embroidery Machine


Specifications

  • Size- 15.51 x 21.18 x 16.54
  • Weight- 26.24 pounds
  • Built-in stitches- 103
  • Stitch Per Minute- 710

Whether sewing is your hobby or you plan to start your own sewing business, the Brother SE600 Sewing and Embroidery machine won’t disappoint you.

Beginners will find using the two-in-one sewing and embroidery machine with an automatic needle threader very convenient. It’ll no longer strain your eyes and save you time.

Also, the possibilities for making different stitching patterns are endless with the machine’s 103 in-built stitching patterns.  The machine features a large detachable table with a free armhole and a wide 4×4 embroidery area.

It also has an embroidery arm to easily replicate the computerized generated designs in the fabric, limiting chances of error.

Also, the touchscreen LCD screen is there to help you further select the design, color, stitch pattern, etc.

I also have no complaints about the work speed of the machine. The 710 spm is a great speed to get your work done on time. The device is ten on ten on looks and design, making it a suitable investment for beginners.

Pros 

  • Automatic needle threader
  • LCD screen to review designs
  • Optimum stitching speed
  • Embroidery arm to easily copy the designs on the fabric

Cons 

  • Not very portable
  • User instructions could have been clearer

Best sewing machine for beginner kids 

Magicfly Portable Sewing Machine

Specifications

  • Size- 14.96 x 12.2 x 7.87
  • Weight- 7.39 pounds
  • Built-in stitches- 12

The Magicfly Portable sewing machine is the perfect option for beginner kids looking for a compact model to carry to their sewing classes.

This model is also best for new sewists who want an affordable model with the necessary features. The machine supports 12 stitching styles, such as zigzag, straight stitching, and more.

The stitches are arranged numerically, and you can select your desired stitch by adjusting the regular. Even though it’s a small machine with minimal features, you can quickly stitch thin, thick, and soft fabrics.

Magicfly Portable sewing machine has three needles of varying sizes to support different stitching fabrics.

The machine includes a complete set of accessories with all essential sewing tools and an expansion table ready to use.

But since the machine is affordable, you won’t get facilities like an automatic needle threader, LCD screen, automatic bobbin winder, and the like.

Pros 

  • Can easily fit in any space
  • Easier to operate
  • Comes with all essential accessories
  • Supports multiple stitching

Cons 

  • No LCD screen
  • Lacks advanced automatic features

Best Beginner Sewing Machine FAQs

What Type Of Sewing Machine Is Best For Beginners?

For beginners, look for a sewing machine that is mechanical rather than computerized. Mechanical machines are simpler to use and provide more control over stitching and tension settings. Look for a device with adjustable stitch length and width and reverse stitching capabilities. A built-in thread cutter can also help speed up the sewing process.

When shopping for a beginner machine, it is essential to look for one that is lightweight and easy to maneuver. A model with an ergonomic handle can help beginners keep their hands comfortably in place while sewing. Consider models with a carrying handle or other convenient transport systems for taking your machine on-the-go.

Finally, finding a sewing machine that fits your budget is essential. While more expensive models may offer additional features, breaking the bank is unnecessary when looking for an entry-level machine. There are plenty of reliable and affordable beginner machines that can get you off to a successful start in the world of sewing.

What Are The Different Types Of Sewing Machines?

The different types of sewing machines available today can be divided into two categories: traditional and modern. Traditional sewing machines are those that have been around for decades, such as a treadle machine or a zigzag machine. These models are reliable and often easy to use but may not have the same features or power as more modern machines.

Modern sewing machines are much more advanced, often offering automatic threading, stitch patterns and needle positions, adjustable speed settings, and even computerized controls. Some high-end models may even include built-in embroidery capabilities or LCD screens for intricate design work. These machines can be expensive but offer a wide range of features that simplify the sewing process.

Can I Teach Myself To Use A Sewing Machine?

Yes, you can learn sewing on your own with the help of YouTube videos. You’ll find many online sewing tutorials helping you learn sewing without needing to attend sewing classes.

How Much Should A Beginner Spend On A Sewing Machine?

A beginner can spend anywhere from $250 to $1000 on a sewing machine. Beginners should opt for a machine that is not too complicated but, at the same time, should have the essential features so that it lasts a long time. This can be achieved with about $300.

Is Brother Or Singer Better?

Both Brother and Singer are heavy-duty sewing machines. But when it comes to durability, Brother is slightly better than Singer. Also, Brother has so many portable options compared to Singer.

What Are The Easiest Clothes To Sew For Beginners?

Cotton and such plain fabrics are the easiest for beginners to sew. They aren’t too slippery; hence sewing them would be relatively easier than silk or embroidered fabrics.

Is It Cheaper To Sew Your Own Clothes?

Yes, sewing your own clothes is way cheaper than buying them. By sewing them, you save the manufacturing cost that brands add to the retail prices.

Takeaway! 

Buying the best sewing machine for beginners will be easier if you do your inspection well beforehand. This list has helped you pick your desired model that meets all your sewing needs. The Singer Stylist 7258 is the best beginner sewing machine because it has all the essential features, is easier to use, and is robust enough to withstand regular usage.

Continue Reading Thrifting 101, Learn to Sew. Best Sewing Machines for Beginners

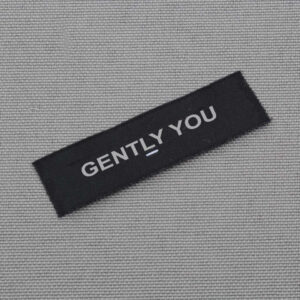
Designing your own clothing and need to make your own labels? DIY

Designing your own clothing and need to make your own labels? Do it yourself!
“Labels aren’t just for store-bought clothes.”

If you make or sell clothing, accessories or other items, labels are a great way to distinguish and promote your brand. They add a sense of quality and a personal touch to your products.

Today, we’ll break down a few methods for DIY-ing your own clothing labels so you can take your handmade game to the next level.

You will need to have some sewing experience to put these labels on your clothing, but otherwise, every method is pretty straight forward.


Method 1: Printed on Fabric Sheets

Tools needed:

  • Computer and printer
  • Fabric sheets for inkjet/laser printer
  • Iron
  • Cold water
  • Scissors or rotary cutter
  • Needle and thread or sewing machine

Step 1: Pick up some printing sheets like these at Joann’s or your local craft store. Make sure you get ones that will work with your inkjet or laser printer. Remember your coupons!

Step 2: Use your computer to create your logo or design. You can use Adobe Photoshop or Illustrator, or something as simple as MS Word (tutorial here) or your computer’s paint program. If you’ve got skills, it’s a good idea to include a light guide or grid in your design that will make cutting out your labels easier. However, you can also draw your lines in later by hand. Also, make sure to leave enough blank space around your design to allow for stitching on your label.

Once you’re satisfied with your design, do a test run by printing on regular paper first to make sure you’re happy with the look, size and placement.

Step 3: When you’re ready, print your design on the fabric sheet on the fabric side.

Step 4: Let the label ink dry for at least 10 minutes. Then remove paper backing and iron on high for 1-2 minutes on the printed side of the sheet to set the design. Don’t apply too much pressure or your design could come out distorted or wonky. Be sure to consult the ironing directions that come with your printable sheets in case there are any variations.

Step 5: Next, rinse the sheet under cold water and pat dry using towels or paper towels. Dry iron again on high until the sheet is dry. This step ensures colorfastness so your labels will stand up to multiple washes without fading.

Step 6: Cut your sheet into individual labels. If you have a rotary cutter, mat and ruler use them for quick accurate cuts. If not, simply using a ruler or straightedge to plot your lines and cutting them out with scissors will get the job done just as well.

Step 7: Finally, use a needle and thread or a sewing machine to attach your fancy new labels to your items. Edges of your label may fray. If you want to avoid this, consider sewing around all four sides of the label.

Method 2: Iron-on Transfer Paper

This process is similar to Method 1, the difference is instead of printing directly onto a fabric sheet, your design will be printed onto a transfer paper which will be ironed onto a fabric or ribbon.

The advantage of this method is that you get to choose the material for your label instead of it being made of the printable fabric sheet. This method provides you with slightly more customization and gives you the super easy option of using ribbon to make your labels.

Tools needed:

  • Computer and printer
  • Iron-on transfer paper
  • Iron
  • Fabric or ribbon
  • Scissors or rotary cutter
  • Needle and thread or sewing machine

Step 1: Buy iron-on transfer paper sheets like these at Michael’s or something similar at your local craft store. Again, use coupons!

Step 2: Follow directions from Step 2 above, using your computer to design your logo and arrange it to be printed on the transfer paper, and do a test print first. If you will be using ribbon for your labels, make sure your design will fit within the width of your ribbon.

Step 3: Cut and transfer your labels.

When ironing your labels, follow heat setting and ironing instructions on the packaging for your transfer paper as directions could vary. Place transfers paper side up when ironing. It also might be a good idea to leave the paper layer on until you’re ready to use your label to protect your design.

If using fabric…

At this point you can choose to cut your labels apart first and iron them on individually, or transfer them as one large sheet and then cut the fabric apart.

Either way, if you’re using fabric that will fray, consider backing it with iron on interfacing. Or, you can cut your labels a little larger and fold and iron the edges over before sewing them on. To make this easier, cut a small piece of cardboard the size of your label, place label face down on your ironing board with the cardboard piece in the center, and use it as a guide to fold over and iron your edges.

If using ribbon…

Cut your labels apart and your ribbon into sections before ironing on your transfers. Be careful not to burn your fingers! If necessary, use tweezers or straight pins to hold your label and ribbon in place while ironing.

You can either place your design on ribbon horizontally and fold the edges of the ribbon under when you sew it on, or you can arrange it vertically, cutting the ribbon twice the finished length and folding it in half when attaching it (picture a U shape).

Method 3:  Stamps & Other Options

If you don’t have a printer, there are a couple options to get your own custom labels.

  • Stamping is a quick and easy technique. Either find a premade design that you like or create your own custom rubber stamp (there are a variety of sites and Etsy shops that offer this service). Then, simply stamp on any fabric or ribbon of your choice.
  • Another option is just to order your labels. Sites like Amazon & Etsy make it easy for you customize your label style and logo. This is a great choice if you need a large quantity of labels or just want your items to look super professional.

No matter what method you choose, showing off your brand with DIY labels is totally doable!

How to Thrift Shop 10 Essential Tips

How to Thrift Shop: 10 Essential Thrifting Tips

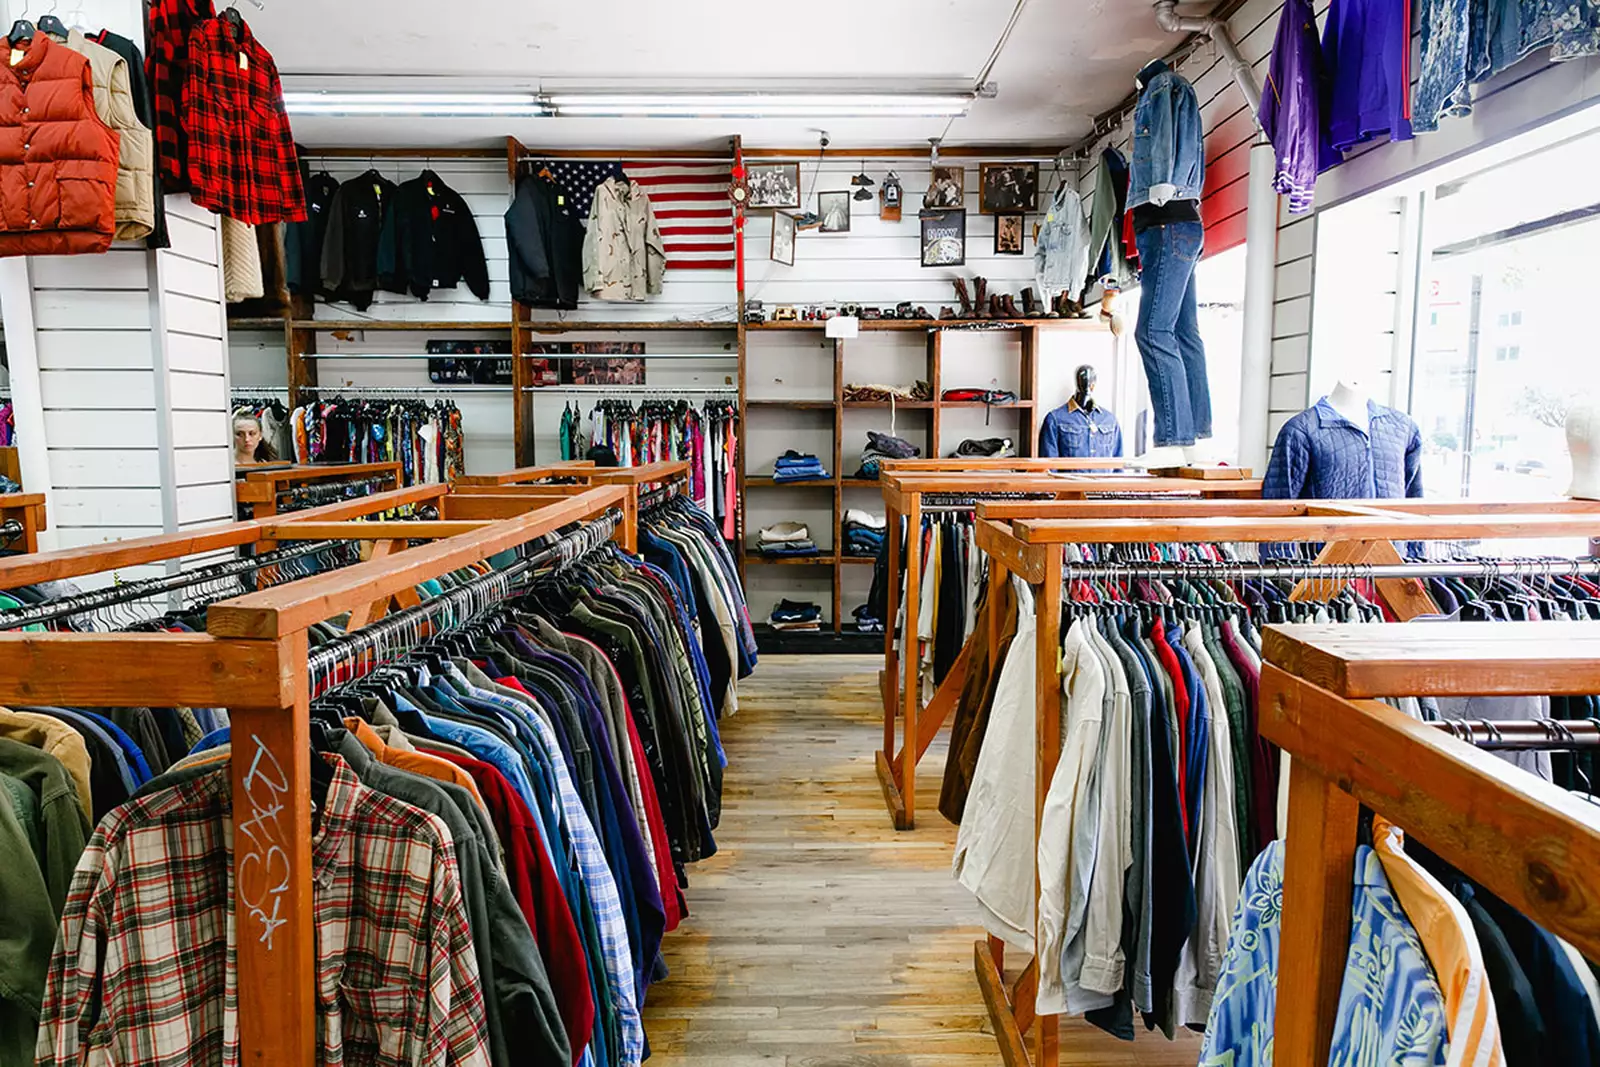
Thrift store shopping takes patience and self-control, but you can find some of the best items at consignment shops like your local Goodwill store or the Salvation Army. There’s a strategy to becoming an efficient thrifter, and if you do it often enough, you can end up with great finds at much lower prices than you would at a standard retail store.

10 Thrifting Tips

If you love thrifting new clothes and are looking for shopping tips to help you find your next great buy, check out the following list:

1. Find out the store’s specialty beforehand. You can make the thrift shopping experience much easier if you know what the store carries. Some thrift shops specialize in clothing or toys, while others will have a wide array of furniture or home décor. Before heading out, find out which store stocks more of the specific items you’re looking for, and search there first.

2. Dress appropriately. Many thrift stores don’t have fitting rooms, so you might need to wear something you can easily slip secondhand clothing over to try on. Secondhand stores usually don’t offer refunds, so you want to make sure your clothing fits before you buy it.

3. Give yourself a clear goal. Thrift shopping should be about finding things you need, not meandering around looking to collect items. Take note of the things you already own, then make a mental list of the things you’re looking for. If you need to, take pictures with your smartphone to help you remember what you have and what you want.

4. Get your items tailored. One of the few disadvantages of thrifting is that you may find the perfect piece, but it may not fit properly. This can be an easy fix: If it’s a quality find, take it to a tailor. Or, if you’re confident in your sewing and hemming abilities, you can attempt a DIY tailoring job to make your item fit just right.

5. Know when the stores restock. Most stores are busiest on the weekend, and many quality goods may be gone by then. Pay attention to when your local thrift stores restock new items and try not to wait too long to check them out.

6. Avoid impulse buys. Thrift stores may have low prices, but it can start to add up if you buy enough items. Set a budget and leave your cards at home. Taking a cash-only approach will help you stick to your list of needs and help you avoid overspending.

7. Learn how to discern quality. Consignment stores can offer designer brands, vintage items, or other high-end quality pieces with low price tags that you can find if you know what to look for. Natural materials will often be of higher quality than synthetic ones. Shoes made of 100 percent leather usually have the words “Vero Cuoio” marked on the bottom, which is the Italian phrase for “true leather.” Blazers with linings and wool-blend coats will also be more expensive items than other materials. Get familiar with high-quality tells to discern which items will be worth the money.

8. Scan the aisles. It’s easy to get caught up searching for great, inexpensive buys at the thrift store, but part of your strategy should be to search quickly through the aisles to avoid spending too much time in any one store. Train your eyes to scan along hangers or shelves to spot particular color palettes or other items of interest quickly and efficiently.

9. Haggle. You can sometimes negotiate the price of items that are broken or damaged. If you find an item worth salvaging, try haggling the price down with the sales clerk to make it even more affordable.

10. Shop off-season. Like with retail stores, the best time to buy seasonal clothing is when the demand is low. Shop for jackets and boots in the summer, and look for sundresses and sandals in the winter.

Fashion Trend in For Winter

Lorem ipsum dolor sit amet, consectetur adipisicing elit, sed do eiusmod tempor incididunt ut labore et dolore magna aliqua. Ut enim ad minim veniam, quis nostrud exercitation ullamco laboris nisi ut aliquip ex ea commodo consequat. Duis aute irure dolor in reprehenderit in voluptate velit esse cillum dolore eu fugiat nulla pariatur. Excepteur sint occaecat cupidatat non proident, sunt in culpa qui officia deserunt mollit anim id est laborum.

Most Awesome Breathtaking Places

Lorem ipsum dolor sit amet, consectetur adipisicing elit, sed do eiusmod tempor incididunt ut labore et dolore magna aliqua. Ut enim ad minim veniam, quis nostrud exercitation ullamco laboris nisi ut aliquip ex ea commodo consequat. Duis aute irure dolor in reprehenderit in voluptate velit esse cillum dolore eu fugiat nulla pariatur. Excepteur sint occaecat cupidatat non proident, sunt in culpa qui officia deserunt mollit anim id est laborum.